I made a post on the forum about the brake issue and proceeded to make a parts order. With my first order, I purchased the following:
1. DMCH correctly proportioned brake master cylinder
2. Inner door seals, right and left side
3. Trunk gasket
4. Fuel filler hose closing panel
5. Shifter boot
One of the best surprises was my bro Mike sent me the new fuse box and relay update kit as a "car warming" gift. How bad ass was that?
The good news is I have a plethora of parts still in boxes from other car projects. I will keep a running tab of costs also.
I was also able to score three pre-owned parts from James at DMCH for a nice discount:
6. Used steering wheel
7. Used driver's side mirror.
8. Used fuse box cover
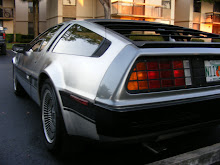
Being the awesome adventurer that I am, one cloudy afternoon Vic and I decided to take the no brake delorean for a test spin around the parking lot. Now, this is the first time this car has moved under its own power. Thankfully the E-brake works, so I was able to force stops. I don't recommend doing that, but we had alot of open area and decided that we were bored enough to be stupid.
But, eventually I wanted to get into the car and drive it. Early one Sunday, I decided to replace the master cylinder.


 This is the factory master. In order to remove, use a set of FLARE NUT WRENCHES! If you try to use a standard wrench, you will succeed not in removing the lines, but in stripping the fitting, and being screwed. Right tool for the right job!
After both lines are removed and gently separated from the old master (beware of dripping brake fluid! Get some rags and place below in order to prevent dripping on painted surfaces!!!), you must remove the two bolts holding the old master cylinder in place. Do so with a ratchet with an extension and a socket.

You may have to do a bit of a wiggle to separate the old master and reservoir from the brake booster, so be gentle!

This is the brake booster (or servo if you wish) without the master. make sure you clean up the surface before installing the new master!
The old reservoir is held in place by two small cotter pins and two rods. Remove the cotter pins, slide out the rods, and gently pull up on the reservoir, being careful not to get any nasty old brake fluid on you. After separating, reinstall the reservoir onto the NEW master cylinder in the reverse order. This is a good time to CLEAN the old part before reinstalling!

Now don't let this fool you, the part WAS cleaned before reinstalling.

The DEEP end of the reservoir goes closest to the brake booster. Just a reference, in case you didnt know.
Now, at this point, do NOT install the new assembly into the car. Instead, bench bleed the new master cylinder. If you need directions on what bench bleeding is, Google and Wikipedia are your friend! It's basically a way to make sure you have primed the part to ensure proper fluid flow instead of huge pockets of air.
To install the part, do so in reverse order of the removal!

This will be the extent of my work on the car until Fall. I live in Fort Lauderdale, and it is WAY too hot and humid to work on the car. Instead, I will be going through parts and pulling some stuff out of storage to see what I need.

No comments:
Post a Comment