Sunday, November 8, 2009

Chaaaarge! Please? Pretty Please? Bad Alternator Replacement!

I will be the first to say that I love the vendors. Sure, they offer some amazing products and such, but sometimes I like thinking outside the box.

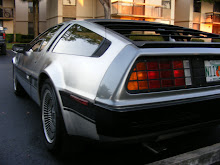
Lets take a look at alternators.

DMCH and SpecialTAuto (or deloreanautoparts.com) both have alternators. Both will set you back a few bucks, but both have controversy following them, depending on if you want a super-overpowered model that has a record of failing, or if you want a direct bolt in replacement.

After doing some homework, I found that it is VERY possible to take an off the shelf alternator and install it into my car.

I spoke to a forum member, and ended up securing an alternator for a 1994 Chevy Lumina for $100.00 with a lifetime replacement warranty. That is great, because once installed, I can simply unplug it and swap it for a new one without any shipping or waiting! Since i'm planning on driving this car, it also makes it possible to replace it on the road, as long as there is an auto parts store. Note the serpentine pulley. You WILL need to swap your stock pulley.

First, I secured the alternator at Autozone (Part Number: DL1387-6-3.

The next item that had to be purchased was the pigtail connector to allow plug and play connecting.


I found this connector (part number 30707 if you order from Autozone.com)on ebay for $13.00 shipped! Sweet! I believe I found it using the same part number, because it is the number from Painless Wiring. It is a two wire hook-up, which you will need. I will explain it as I go on.


This is the stock Motorola alternator. The reason I replaced it was because i could hear the bearings squealing as it turned. A sure sign that failure was about to happen.


I strongly suggest having a second person help you. You CAN do this with one person, but sometimes it saves time from going from under the car to above the car... and vice versa... This is my friend Vic learning the ropes of D maintenance.

Before we get going, lets get our tools ready:
1. Socket set with box-end wrenches
2. Needle nose pliars (always a good idea!)
3. RED locktite
4. (optional) air ratchet
5. Soldering iron with solder
6. Shrink wrap
7. Impact gun with impact sockets
8. Dremel with cut-off wheel (or a good hacksaw)


I tried to undo the electrical connections from the stock alternator first, but that failed due to corosion, and the fact the post was free spinning with every turn of the ratchet. I instead dropped the alternator so I could attack it easier. Finally the corosion broke loose and I was able to remove all electrical connections.

Here is a side by side comparison of the two alternators. The mount on the new one will have to be cut down slightly. I highly suggest a dremel with a cut off wheel, or a very good hacksaw.

After you lay the two alternators side by side and measure how much of the new alternator you need to cut down, mark the area off with either a marker or some tape. I used blue painter's tape because it is VERY visible. Wearing proper eye protection (flying shards of aluminum are no fun...) Cut through the extra piece off the new alternator.


Now, you can see the aftermath of the cut down: The removed portion that I cut off is in my hand.

The little nub at the lower left corner is easily removed by the cut off wheel. Takes less than 10 seconds to grind down, but you can see the results of the cutting. VERY easy to do.

Now, grab your impact gun and impact sockets and zap the V-pulley off of the original alternator, and zap the serpentine pulley (comes with a spacer and washer, btw...)off of each. To stop the pulley from free spinning, gently put a screw driver in between a fan blade and into the housing, then pull your trigger!

VERY important: See that little spacer to the left of the pulley? Well, place that BEHIND your new fan. Reason? When you tighten the nut, you will put force on the fan, causing it to flex into the housing. With the spacer there, you can torque it down alot further. Install your old V pulley, washer, and nut. Before zipping it down, add the Lock-Tite! You'll thank me later...

Here is a picture of the final product. Feel free to pull off the tape now... You will notice the NEW alternator does not have a rear bracket like the stock Motorola unit. If you notice your car's alternator mount, the part of the bracket your bolt goes though is significant, so don't worry.


Now, you have to solder in your connector. VERY easy to do. First, the white wire gets attached to the single brown wire that was attached to the back of your old alternator. This goes to your battery light. The second wire on your pigtail is red with a little loop on it. Simply attach this loop onto the post on the alternator that you are attaching your wiring bundle to. Shrink wrap, and plug into your alternator! When you route your wires, make sure you are away from the exhaust manifold!!!

If you cut your alternator properly, it will line up PERFECTLY! Now, tension your belt so that you get 1" of flex with moderate pressure, and TEST!


Yep, my voltage gauge is now showing an actual charge! BTW, my gauge is all screwed up. I will explain the issue with that in a future installment of the blog.

That's all there is to this upgrade. I can now replace my alternator ANYWHERE, including a junk yard, if i have to!

A very special thanks to:
- dmcman73 (steve) from DMCTalk.com for his great write up and instructions, plus for answering all my questions on the swap.
- Joe and Missy for loaning me their garage to do this on a very hot Saturday morning.
- Vic for being the second pair of hands.

Im a slacker... and that's about it.

I already said that I suck at updating this thing, so don't be amazed that it's been a month with no updates. Although nothing is posted here, there has been some progress on the car. First, lets update "the list"...


"The List" --UPDATED 11/08/2009
1. License Plate Bezel
2. Re-seal windshield
3. Bleed Brakes
4. Bleed Clutch
5. Test Power Windows
6. Remove all headliner material
7. Evaluate PS visor leak
8. Check motor mounts
9. Remove trunk carpet and backboard
10. Cut new trunk carpet backboard from plexiglass
11. Fuse Box Replacement
12. Relay update kit install
13. Right Rear Rim repair
14. Rock Guard restoration
15. Tune-up kit
16. Evaluate temp gauge function
17. Front Fascia reinstall/alignment
18. 3rd brakelight purchase
19. 3rd brakelight install
20. AC Evap Purchase
21. AC Compressor purchase
22. AC Lines purchase
23. AC evap install
24. AC compressor purchase
25. AC lines install
26. Cold start circuit check
27. Fuel filter purchase
28. Accumulator purchase
29. fuel filter install
30. Accumulator install
31. Antenna purchase
32. Antenna install
33. purchase new headliner boards (also evaluate current boards)
34. Purchase steering wheel
35. Install steering wheel
36. Purchase driver's side mirror
37. Install driver's side mirror
38. Purchase seat covers
39. Install seat covers
40. Refinish trunk and fiberglass
41. Primer
42. SEM Trim black
43. Purchase Simple Green
44. Wash engine bay
45. Pull intake manifold
46. Purchase POR-15
47. POR-15 VOD
48. Purchase missing fuel closing panel
49. Valve cover gaskets
50. VOD sensors
51. Purchase plastic primer
52. Purchase gunmetal paint
53. purchase matte and silver paints
54. Silverstar Low Beams
55. Silverstar High Beams
56. Door light toggle
57. Power Antenna Toggle
58. Purchase power window switches
59. Install power window switches
60. Remove tape from driver's window
61. fix hood release

Whew! That was fun! It was soo much fun, im going to ADD TO IT!

62. Purchase new voltage gauge
63. Purchase new fuel sender
64. Begin design of diagnostic center
65. Purchase D-center voltage gauge
66. Purchase D-center fuel pressure gauge
67. Purchase D-center vacuum gauge
68. LED for side markers
69. LED for license plate
70. Headliner fabric
71. Toll booth window gaskets
72. Outer door seals
73. AC vents... alot of them
71. Door lever trim pieces
72. A-Pillars in black


That's enough for now...

Saturday, October 3, 2009

Interior: Wiring, Leaks, and Dried Upholstery...FUN!

This will take you from Late June to early July, even though I am only posting this in October. Like I said earlier, I have very little time to do these updates, and have been piling them up.

May, June, and July were EXTREMELY wet months in Fort Lauderdale. We went literally through almost 3 solid weeks of rain. After that, we hit our standard rain pattern of midday torrential downpours and heavy lightning. This is great for our drought situation, but horrible for the owner of a DeLo that has bad weather seals!!! This is the main cause for the state the interior was in when the car was purchased.

I could tell from day 1 that the windshield has to be addressed, because the A-pillar pieces are all pulled away, and i can see humidity build up from there. After a rain storm, I can see visible signs of fresh water, so therefore, the glass MUST be pulled and resealed. I will probably take this to DMCF to have it done.

Here are the general interior shots. Please note that I had not really done anything to this car as of this point. I had mostly concentrated on the running aspect of it. Alot of these electrical compartment pics were taken the day after the car was brought home, so sorry they are a little late getting posted. These are pics of what the car was like after coming off the trailer:


Now for actual interior shots:


I live in a parts store...

Late June/ Early July

This is only the stuff that has come in the mail. The boxes are surprises that I have had in storage that I have to go through. My apartment is also full of interior pieces waiting to be 'freshened'...


Does it drive?

Still from June 2009 journal:


Yes. :-D


This was first startup. This was a quick snap shot before oil pressure gauge even went all the way up. I hold just below 80psi when driving, and yes, the voltage gauge is accurate, unfortunately. There are a mess of grounds that I need to clean up.

The Brake Test... oh what a failure!

In June, my neighbor Vic and I decided to bleed out the brake system in order to drive the car. At this point we found out the hard way that there are no brakes!


I made a post on the forum about the brake issue and proceeded to make a parts order. With my first order, I purchased the following:


1. DMCH correctly proportioned brake master cylinder

2. Inner door seals, right and left side

3. Trunk gasket

4. Fuel filler hose closing panel

5. Shifter boot


One of the best surprises was my bro Mike sent me the new fuse box and relay update kit as a "car warming" gift. How bad ass was that?


The good news is I have a plethora of parts still in boxes from other car projects. I will keep a running tab of costs also.


I was also able to score three pre-owned parts from James at DMCH for a nice discount:

6. Used steering wheel

7. Used driver's side mirror.

8. Used fuse box cover


Being the awesome adventurer that I am, one cloudy afternoon Vic and I decided to take the no brake delorean for a test spin around the parking lot. Now, this is the first time this car has moved under its own power. Thankfully the E-brake works, so I was able to force stops. I don't recommend doing that, but we had alot of open area and decided that we were bored enough to be stupid.


But, eventually I wanted to get into the car and drive it. Early one Sunday, I decided to replace the master cylinder.


This is the factory master. In order to remove, use a set of FLARE NUT WRENCHES! If you try to use a standard wrench, you will succeed not in removing the lines, but in stripping the fitting, and being screwed. Right tool for the right job!


After both lines are removed and gently separated from the old master (beware of dripping brake fluid! Get some rags and place below in order to prevent dripping on painted surfaces!!!), you must remove the two bolts holding the old master cylinder in place. Do so with a ratchet with an extension and a socket.


You may have to do a bit of a wiggle to separate the old master and reservoir from the brake booster, so be gentle!


This is the brake booster (or servo if you wish) without the master. make sure you clean up the surface before installing the new master!

The old reservoir is held in place by two small cotter pins and two rods. Remove the cotter pins, slide out the rods, and gently pull up on the reservoir, being careful not to get any nasty old brake fluid on you. After separating, reinstall the reservoir onto the NEW master cylinder in the reverse order. This is a good time to CLEAN the old part before reinstalling!


Now don't let this fool you, the part WAS cleaned before reinstalling.


The DEEP end of the reservoir goes closest to the brake booster. Just a reference, in case you didnt know.

Now, at this point, do NOT install the new assembly into the car. Instead, bench bleed the new master cylinder. If you need directions on what bench bleeding is, Google and Wikipedia are your friend! It's basically a way to make sure you have primed the part to ensure proper fluid flow instead of huge pockets of air.

To install the part, do so in reverse order of the removal!


This will be the extent of my work on the car until Fall. I live in Fort Lauderdale, and it is WAY too hot and humid to work on the car. Instead, I will be going through parts and pulling some stuff out of storage to see what I need.

Testing... 1, 2, uh oh!

So im updating this blog now with more of my hand written journal entries. I started a checklist of things to check. Here are a few items and the results of the tests...

Brakes- Fail. Must add Master Cylinder to the list.
E-Brake- Pass (it's how Brandon, Laura, and I loaded the car onto the trailer!)
Headlights- One has water in it, but both work. Upgrade. Pass.
Parking Lights- Pass
Tail Lamps- Pass
Side Markers- Pass. Need gaskets
Horns- FAIL. Sounds like a choking mouse
Windows- FAIL. Switches work after beating on them; driver's side needs to be realigned.
Power Mirrors- Passenger: PASS. Drivers- FAIL. Need to replace entire driver's mirror
AC Panel- Lighting- PASS
AC Controls- FAIL. Mode switch hissing. Needs rebuild.
AC Temp- FAIL. AC is dead.


Parts list update:
62. Purchase brake master cylinder
63. Install brake master cylinder.

Sunday, September 27, 2009

Let's Make a List!

I will be the fist to admit, I suck at updating things. I have a journal that I keep of the car on paper, so I will transfer that onto this site, making it much more permananent.

I made a list back on June 23rd of everything noticeable that the car needed. This is, of course, a work in progress, so I will continue to update it as time goes on.

This is not only a "to buy" list, but also includes the act of installation, because anyone can just BUY parts... eventually you have to take the time to install them too! This car is seriously a work in progress. It will remain so for a LONG time, as I am also making sure I do the smart thing and still put money into my savings account instead of just blowing every cent on car parts.

So, here is my June 23rd list of "what my car needs in order for me to feel warm and fuzzy."

"The List"
1. License Plate Bezel
2. Re-seal windshield
3. Bleed Brakes
4. Bleed Clutch
5. Test Power Windows
6. Remove all headliner material
7. Evaluate PS visor leak
8. Check motor mounts
9. Remove trunk carpet and backboard
10. Cut new trunk carpet backboard from plexiglass
11. Fuse Box Replacement
12. Relay update kit install
13. Right Rear Rim repair
14. Rock Guard restoration
15. Tune-up kit
16. Evaluate temp gauge function
17. Front Fascia reinstall/alignment
18. 3rd brakelight purchase
19. 3rd brakelight install
20. AC Evap Purchase
21. AC Compressor purchase
22. AC Lines purchase
23. AC evap install
24. AC compressor purchase
25. AC lines install
26. Cold start circuit check
27. Fuel filter purchase
28. Accumulator purchase
29. fuel filter install
30. Accumulator install
31. Antenna purchase
32. Antenna install
33. purchase new headliner boards (also evaluate current boards)
34. Purchase steering wheel
35. Install steering wheel
36. Purchase driver's side mirror
37. Install driver's side mirror
38. Purchase seat covers
39. Install seat covers
40. Refinish trunk and fiberglass
41. Primer
42. SEM Trim black
43. Purchase Simple Green
44. Wash engine bay
45. Pull intake manifold
46. Purchase POR-15
47. POR-15 VOD
48. Purchase missing fuel closing panel
49. Valve cover gaskets
50. VOD sensors
51. Purchase plastic primer
52. Purchase gunmetal paint
53. purchase matte and silver paints
54. Silverstar Low Beams
55. Silverstar High Beams
56. Door light toggle
57. Power Antenna Toggle
58. Purchase power window switches
59. Install power window switches
60. Remove tape from driver's window
61. fix hood release

Now THAT is a list! Mind you, not all of these are necessary, but what I want to make the car work the way that I want it to.

Monday, June 1, 2009

VIN #16336

After years of swearing I would never buy a DeLorean, mainly because i've worked on them too much and was tired of them, this one fell into my lap.

Originally, the previous owner (or P.O.) wanted to restore the car. He had quite a bit on his hand, as the car had been previously sitting in someone's back yard for quite some time. Attached are pics from his files when he first purchased the car:


Needless to say, it needed work. The p.o. was able to do quite a bit in the time he had it. Not only did he get the car to run, but he was able to redo the entire fuel system, flush out the brake system, and replace quite a few parts.


Getting the car home itself was quite an ordeal. Originally, I had intended to film the entire day, but due to headaches and frustrations, that quickly fell by the wayside. Instead, I only captured a few pictures.


These were taken in south florida right before I offloaded the car. Since I didnt get the car unloaded until late, I had to wait to fully document the car. This is the condition of the car the next morning in the sun:


My first priority was to WASH the car, because it is filthy. The car was stored outside, which shouldn't affect a car in any way, but because of the DeLorean's AWESOME open vented engine bay design, rain, dust, dirt, spiders, monkey's, volkswagens, etc... can all just land in that engine bay and make it dirty.

Here is a pic after a quick bath.